More than one boiled egg has been hurled across my kitchen in a fit of disgusted rage due to its un-peel-ability. I actually have shed tears over pitted, ugly, ruined boiled eggs that were meant to be beautifully deviled and delicious. After much research (thanks Mama and Ina Garten, among others) and a little practice, I believe I have compiled the information needed to make boiling and peeling eggs as pain-free as possible. Most any information you read will tell you that the older the egg, the easier it is to peel, so it's not a bad plan to use eggs that have been around for 5 to 7 days. I have used fairly fresh eggs with this procedure with very good results. Here goes...
Just about to boil.
Place your eggs in the pot and cover with cold water.
Put 'em on the burner and crank up the heat.
While heating, add a tablespoon of baking soda to the water. This is supposed to raise the pH and make the membrane beneath the peel stronger, making them easier to peel.
Bring the water to a boil, then immediately remove them from heat and smack a lid on them.
Let them sit for 10 minutes, then immediately place them into a bowl full of ice water.
Let them sit for 5 minutes in the ice water, then immediately remove. This will keep the center of the egg a little warm while the outside is chilled, helping to loosen the shell.
Now this part is a little strange, but it helps. Tap the egg on each end to crack the shell, and remove a small section from each end. One end should have a little air pocket in it, which makes it easier to start. Now tap around the sides to crack the shell all around the egg. Next, take the egg in your fist and blow into the narrow end of the egg, where you removed the shell. Pretend you're trying to blow the egg completely out of the shell. You might actually accomplish that, but odds are, you will blow around the egg and help loosen the shell so that it will peel off in one piece. Look this up on youtube, there are tons of videos on the subject.
Start peeling and the membrane should separate from the egg and prevent pitting or peeling away little parts of the white. GOOD LUCK!!
These pickled eggs with sausage are delicious and super easy to make. You can tweak the recipe pretty much any way you want. Last night I used jalapeno sausage and added lots of Louisiana Hot Sauce and red pepper flakes. I hope they turn out super hot and spicy! The following recipe is not spicy but still really delicious and flavorful.
A gallon of pickled goodness!
A few notes:
The longer you leave them refrigerated before serving them, the stronger their flavor will be. I recommend at least a week.
You can use 3 cups of white vinegar instead of the combination of the three if that's all you have on hand. I like to use all three just to add a little color and flavor.
This recipe makes enough pickling brine for a gallon jar or 3 quart jars.
Even though you are going to use sausage that is smoked and therefore already fully cooked, it's a good idea to slice the sausage and boil it for a couple of minutes to get the grease out. Otherwise you will end up with quite a lot of grease floating in globs in the top of your jar. Yuck!
I will be including tips for cooking and peeling boiled eggs in a separate post, just in case you have struggled with this like I have and don't want to end up throwing pitted, messed up boiled eggs across the room and bouncing them off the wall in a Duree Fit.
INGREDIENTS:
Ball Pickling Spice
18 boiled eggs, peeled
1 large onion, chopped into large pieces
1 "rope" length link or 4 bun length links fully cooked sausage of your choice, sliced
3 cloves of garlic, peeled and left whole
2 cloves of garlic, chopped
2 1/2 cups distilled white vinegar
1/4 cup balsamic vinegar
1/4 cup red wine vinegar
3 cups water
2 Tbsp pickling spice
3 bay leaves
Pickling brine. Smells delicious.
INSTRUCTIONS:
Layer peeled eggs, sausage slices, whole garlic cloves, and onion in 3 quart jars or one gallon jar. In a medium sauce pan, combine vinegar, water, and pickling spice. Bring to a boil and add chopped garlic and bay leaves. Remove from heat and pour hot mixture into jar(s). Seal and refrigerate for 5 days to 2 weeks before serving. ENJOY!!
Sometimes I get intrigued by intriguing things and I wanna
talk about them. They're probably things most people don't really care about or
they would be talking about them already, right? Well, maybe so, but I'm gonna talk about some
of them here anyways. Who knows. Maybe
you'll be intrigued as well.
I've always been intrigued by underground things. Underground houses, underground cities, bomb shelters,
time capsules; you bury it, I will be intrigued by it. Today's particular Intriguing Underground Thing is
located in Las Vegas, but it's doubtful you've ever heard of it, and most
people don't even know it exists.
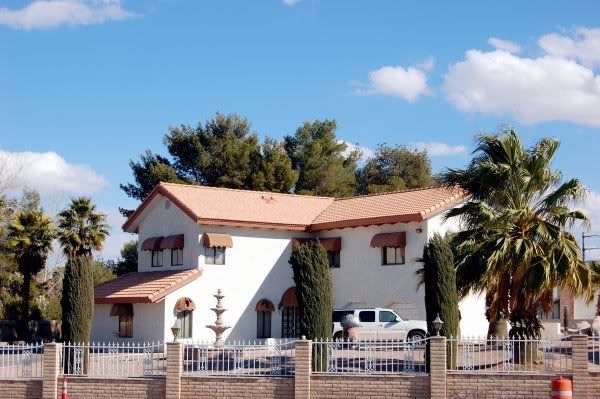
There is a house on a corner in a regular neighborhood.
Notice the Turbine Thingy next to the Suburban?
This house was built in recent years, but before that, this
was a well-landscaped lot surrounded by a fancy fence, which enclosed a
driveway and lots of big boulders and several of these turbine thingies
sticking up out of the ground. Inside
one of the boulders was an elevator shaft, and what lay beneath was an entire 6,000
sq. ft. home built underground. With a
yard. And a sky that changes from day to
night. And a swimming pool, and a guest house.
This thing just blows my mind! Not just an underground home, but the whole
shebang! Astro-turf lawn! A sky that can turn from day to night with
the push of a button! Perfect,
climate-controlled living! No leaves to pick up, no lawn to mow, no snow or
wind or rain or heat to contend with. Leave the doors
open all day, it's Ok! Mama won't yell
at you for running in and out! Yes, I am
truly intrigued by this place and also very sad to know that it is just sitting
down there wasting away. Maybe one day
I'll be able to tour it. Or I can find
it and figure out how to break in. (Just kiddin', Mama.)
The house has been featured on HGTV as well as in several
magazine articles. NEST magazine did an article on the house in 2003. You can see the article, complete with lots
of photos, here.
The home was built by a wealthy man named Girard B.
Henderson. Well, actually, Mr. Henderson hired
an expert in underground living to build the home. The man's name was Jay Swayze, and he lived
in his own underground home in Plainview, TX.
That home is called "The Atomitat" and you can read about it here and here.
I understand that they have tours of this home periodically,
and you can bet I'm gonna find out and take a little drive down to Plainview to
check it out!
There is quite a lot of information about the Las Vegas
house on the web. Here are some links if
you, too, are intrigued and would like to know more:
I was cold this morning.
Cold and Miserable. I got out of
bed and I think I could see my breath. I
keep the heater set at 65 degrees because I am bound and determined that I will
not have a gas bill over $200. Probably
I should do things to make my home more energy efficient, like insulate or
caulk or get new windows, or climb up on the roof and cover up those
whirly-turbine thingys. But instead, I
suffer, the dogs suffer, and we all wear lots of clothes. And drink coffee.
This morning, I got out of my warm toasty bed and all I
could think was COFFEE. Warm, delicious
coffee. That smell that makes you awake
and alive. What I really really wanted was another Caramel Brulee
Latte like I had at Starbucks a few mornings ago, (along with a delicious Bacon
and Gouda Breakfast Sandwich that I will definitely be trying to replicate in
the near future.) What I also really really
wanted was to stay in my jammies and not drive across town to The Coffee Shop
for a regular Latte. If I was gonna have a Latte, I was gonna have to do it
myself.
Unfortunately, I do not own one of those beautiful,
complicated looking espresso machines that steams milk to frothy
perfection. I do, however, own a coffee
maker and a computer. And I know how to
use The Google and The Youtube. Here's
the scoop. It's not technically a Cafe Latte, can't replace the real
deal, but it works in a pinch and I got to stay in my jammies pretty much all
day.
1. Pour a cup of milk
into a Mason Jar. Put the lid on and
shake! shake! shake! it until the milk froths up to about twice its size.
Milk. Shaken.
2. Put the milk in
the microwave and heat it for about 30 - 45 seconds. You don't want it to boil out or froth over,
just heat it up until it's just a little too hot to hold in your bare hands.
3. Your milk will
have lots of foam on top still. You can
use a spoon to hold the froth back while you pour the warm milk into your
coffee, then spoon some froth out into the top of your coffee. Sprinkle with cinnamon, add sugar, whatever
your little heart desires. ENJOY!